Setting up the C++ environment
Objectives
Using Conan, CMake and Visual Studio Code, you will learn to set up a C++ environment on Windows, macOS and Linux.
- How to install the C++ compiler on Windows, macOS and Linux.
- How to install Conan, the C++ package manager.
- How to install the IDE
- How to build and run our first application.
What we will learn
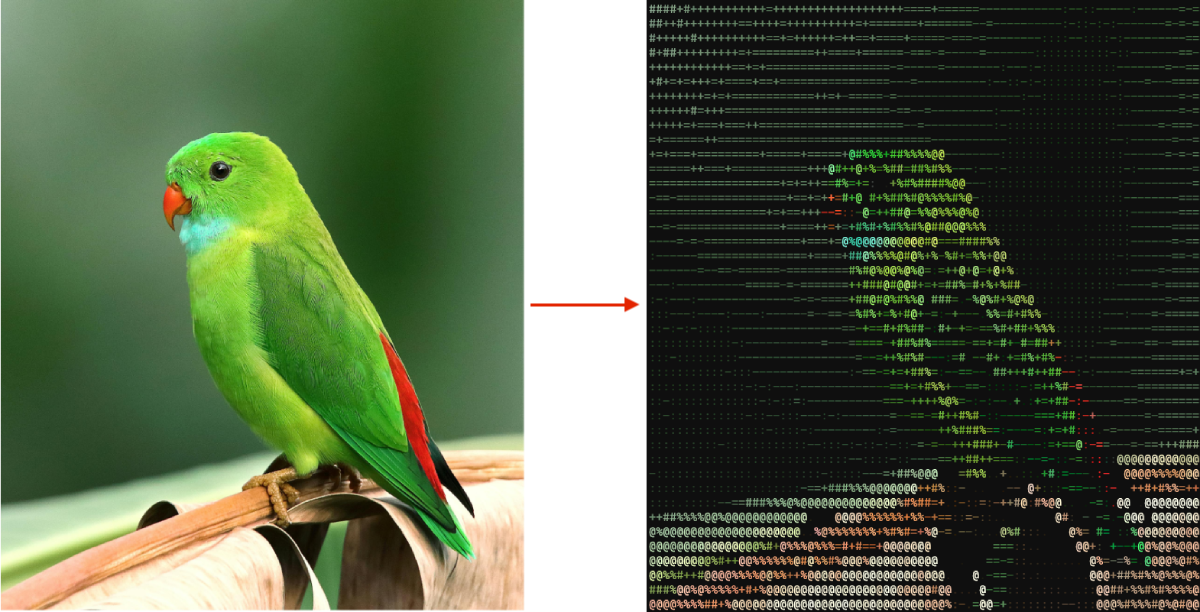
After this chapter we will be able to build a compile C++ program called image2ascii. Image2Ascii will download a picture from the web given an url, and it will convert it in a coloured ascii art. We will be able to download and compile all the required dependencies, build and run the program and make small changes to it.
The program is a slightly modification of the blog.conan.io blog post.
Introduction
There are several factors to consider when setting up the environment:
- It should be self-contained and reproducible
- It should be tool-friendly
A self-contained working environment makes collaboration with other people much more straightforward and makes setting up the CI/CD much quicker. Many companies opt to use docker for setting the working environment. I honestly think this is overkill. A working environment should require the bare minimum dependencies from the system and nothing more.
The environment should be able to build our project and simply the development process. Tools like auto competition, code navigation, code refactoring, code formatting, and static-analyser should be a must-have for our workflow. Setting up an IDE should be a high priority as it can affect our process. In this course, I will use Visual Studio Code as IDE. It's not my favourite, but it's free, cross-platform and customisable.
Terminal
C++ Toolchain
The C++ Toolchain is the collection of tools that translates our source code to an executable that can run in the target machine.
There are many different compilers available today.
MSVC,
GCC,
MinGW,
Clang, and
Intel
are the most popular. These compilers are very different from each other, and learning singularly all of them
takes a lot of time and effort. To our rescue, some CMake will abstract the specific compiler and
allow us to switch between them easily.
A particular note about Clang: clang is part of a more extensive framework called LLVM. LLVM provides many tools for formatting the code, static analysis, and compilers.
How to install the C++ toolchain
CMake
CMake is build system for C++, de-facto a standard. CMake is not able to abstract all the different build system like "Visual Studio", Makefiles, XCode, Ninja. This way we don't need to learn every single tool but only one.
Install Git
Git is a software control version. No knowledge of git will be required during this course.
The only conan we will use is clone, that will download the project locally
from GitHub.
All the source code will be available from the cppyoga GutHub, also the website itself it's hosted there.
Conan
Conan is a C++ package manager. A quick tutorial can be found in conan.io website.
Conan is coming with an extensive documentation, if you want to go more in-depth about conan please read the tutorial section in the documentation.
After installing conan we can create a default profile
conan profile detect
It's also possible, and recommended, to install conan via a Python using a virtual environment, for instance
using
pipenv. This requires to install Python and pipenv but it also allows to have a full
self-contained environment.
For this tutorial I created some profiles and templates to easily use conan and create new projects from
scratch.
To install the conan configuration we can use the conan config command:
conan config install --type git https://github.com/cppyoga/cppyoga-conan-config.git
IDE
The IDE (integrated development editor) is an application combining tools to make coding easier. Usually, an IDE contains an editor where it is possible to write and edit the code and tools to run and debug the applications. Many available IDEs exist. some popular IDEs are:
- Visual Studio: it's working only on Windows and is the most used IDE on this platform. The community edition (CE) is out of charge for students and small companies.
- CLion : it works very well on Windows, Linux and macOS. It's one of the best IDEs for C++ and is out of charge for students. This is also my favourite IDE.
- Visual Studio Code: it works on Windows, Linux and macOS. I honestly find hard to work with C++, but it's free.
How to install Visual Studio Code
Setting up Visual Studio Code
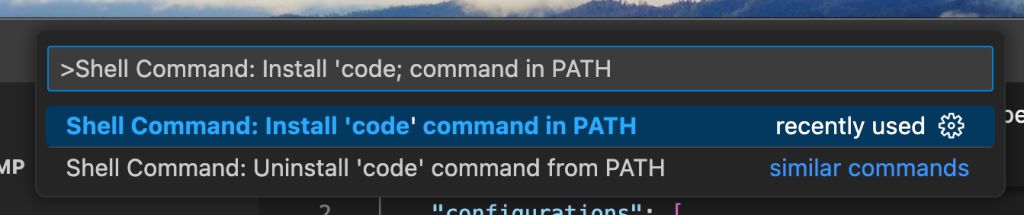
Visual Studio Code has to be available from the command line. After launching Visual Studio Code, press Ctrl+ Shift + P or ⌘ + Shift + P and type “Shell Command: install 'code' command in PATH“
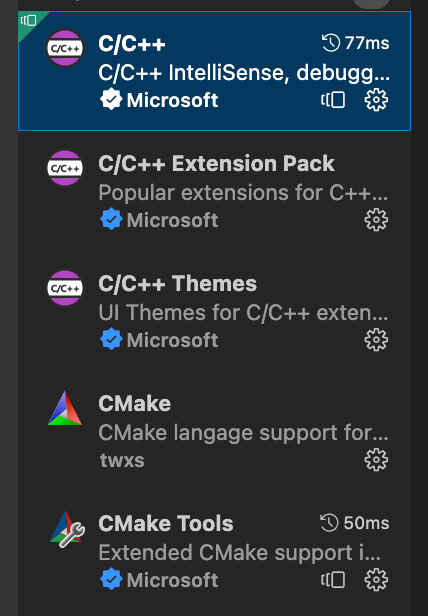
The next step is to install all the recommended C++ extensions. To install an extension, type Ctrl + Shift + X or ⌘ + Shift + P and the extension's name. The following extensions are required:
- C/C++
- C/C++ Extension Pack
- C/C++ Themes (Optional)
- CMake
- CMake Tools
Below a screenshot with all the required extensions:
More information about how to set up a C++ environment can be found here.
Let's build our first program
Now that we have finally set up the environment we are able to build a complex program. The goal is to be build and run an application and not to understand what is the code doing.
If you're using Visual C++, use the Powershell with the Visual Studio environment enabled.
From the terminal
Clone the project and jump inside the cloned directory.
git clone https://github.com/cppyoga/image2ascii.git
cd cppyoga-image2ascii
Build the program from the command line:
conan build . --profile cppyoga/default --build missing
At this stage is not important understand the conan commands, this will be explained in the next lectures.
This command is building the package using the cppyoga/default profile previously installed with
conan config install.
--build missing option is telling conan to build the third party
dependencies if they are not present in the local cache.
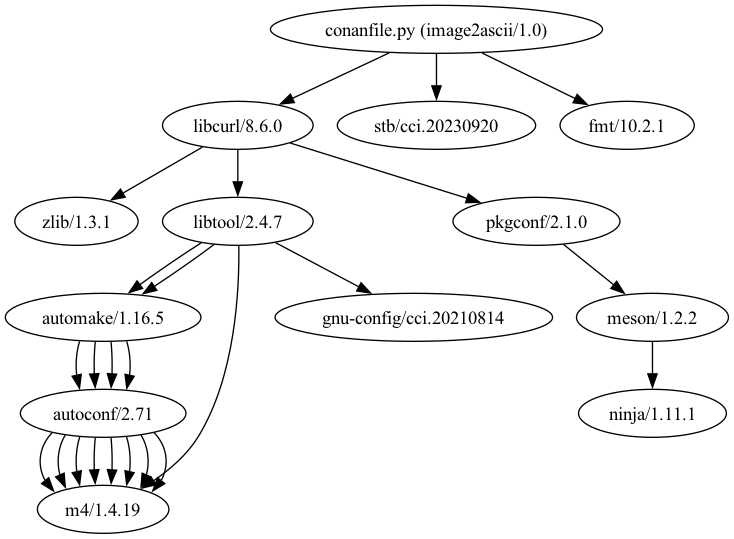
The following is the graph of all the required dependencies
Lunch the application:
./build/Release/image2ascii
After lunching the application, the default image will be downloaded and converted to ASCII art!
From the Visual Studio Code
After building the project from the terminal we can lunch Visual Studio code from command line and the environment.
code .
At the boot Visual Studio Code wil detect some CMake presets similar to the picture below

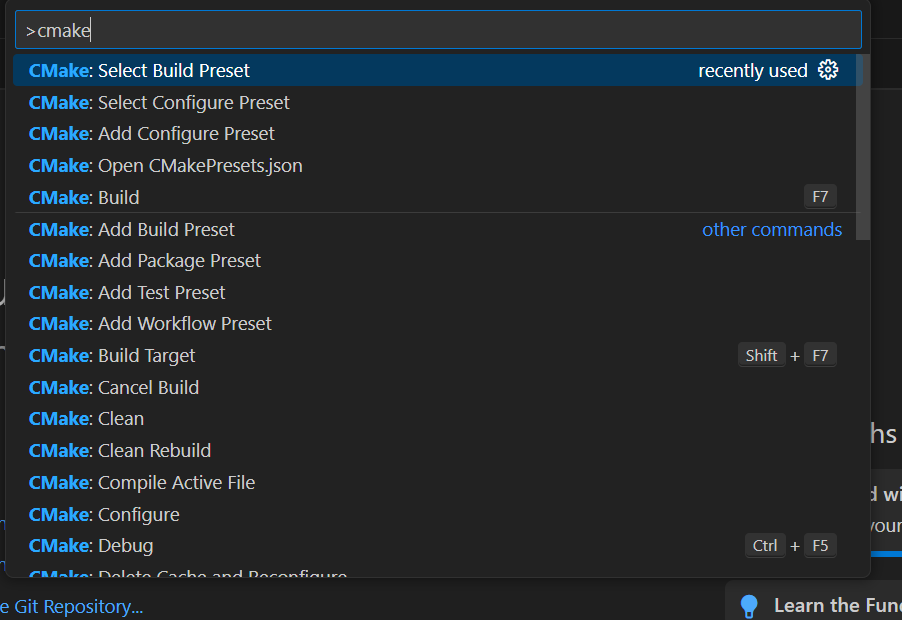
If it doesn't happen just press Ctrl + Shift + P and select
CMake: Select Build Preset
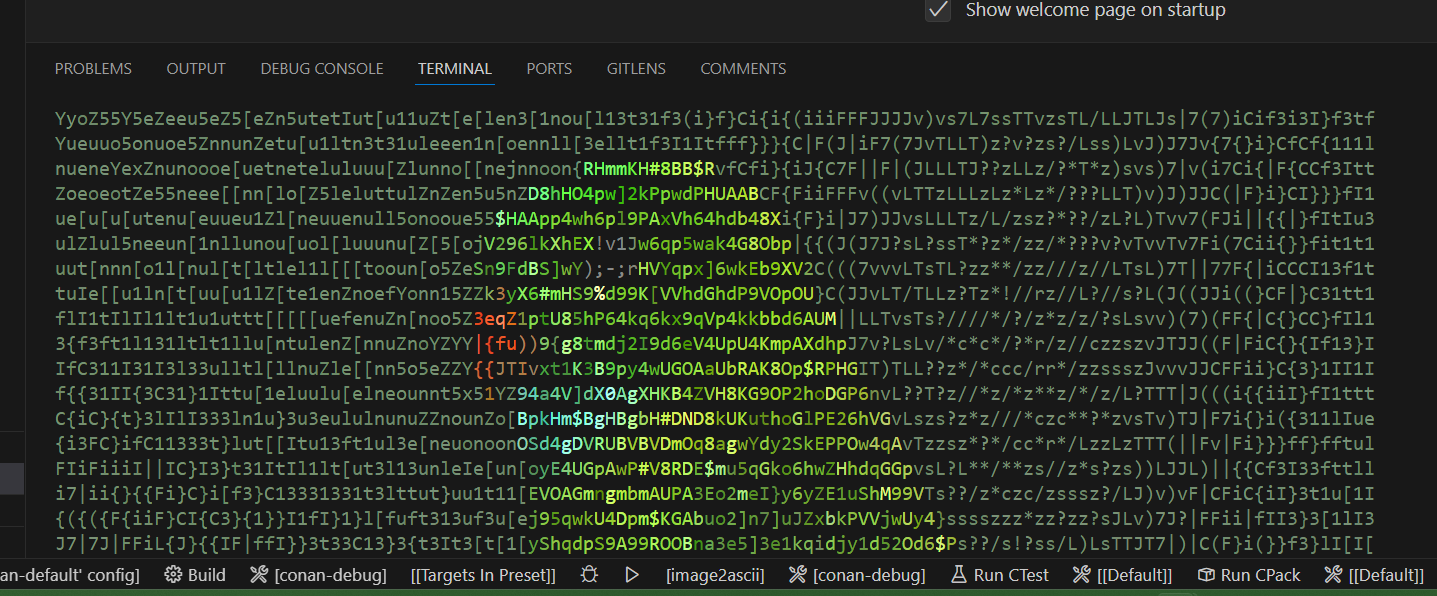
Build and run from Visual Studio Code using the buttons on the bottom bar.

From CLion
After building the project from the terminal we can lunch Visual Studio code from command line and the environment.
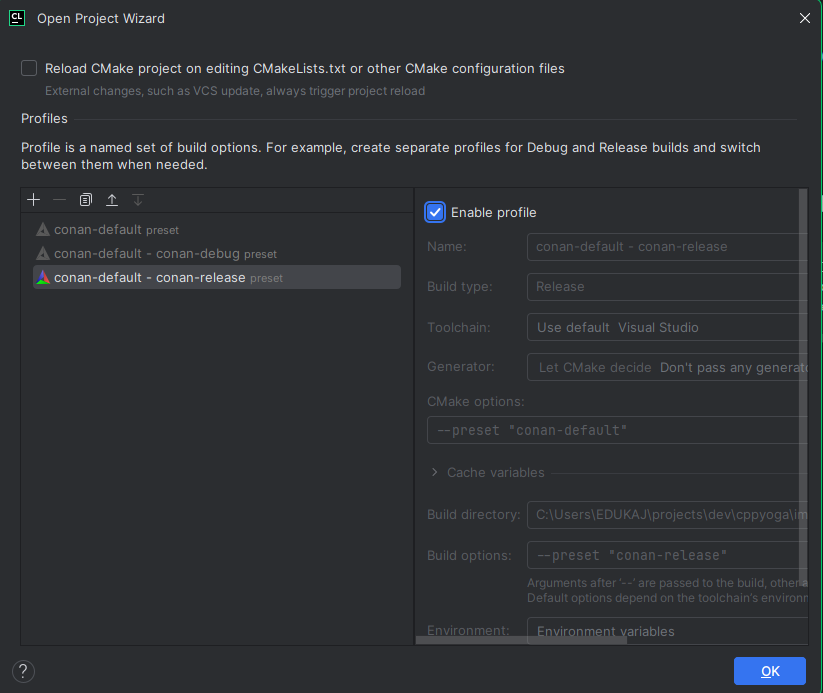
CLion doesn't support well Multi-Config project. While in Visual Studio Code we selected the preset conan
default
in CLion we have to choose conan default - conan-release. In general, we need to choose the presets
that have the pattern conan default - conan-<configuration>.
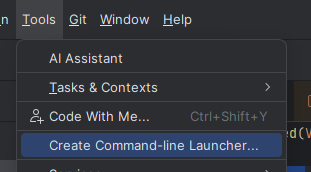
Make sure CLion is in the path. For the instructions go to
Tools / Create Command-Line Launcher...
Follow the instructions on the screen:
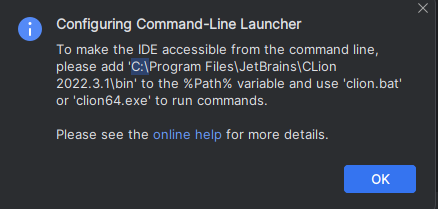
After starting CLion the following window will appear.
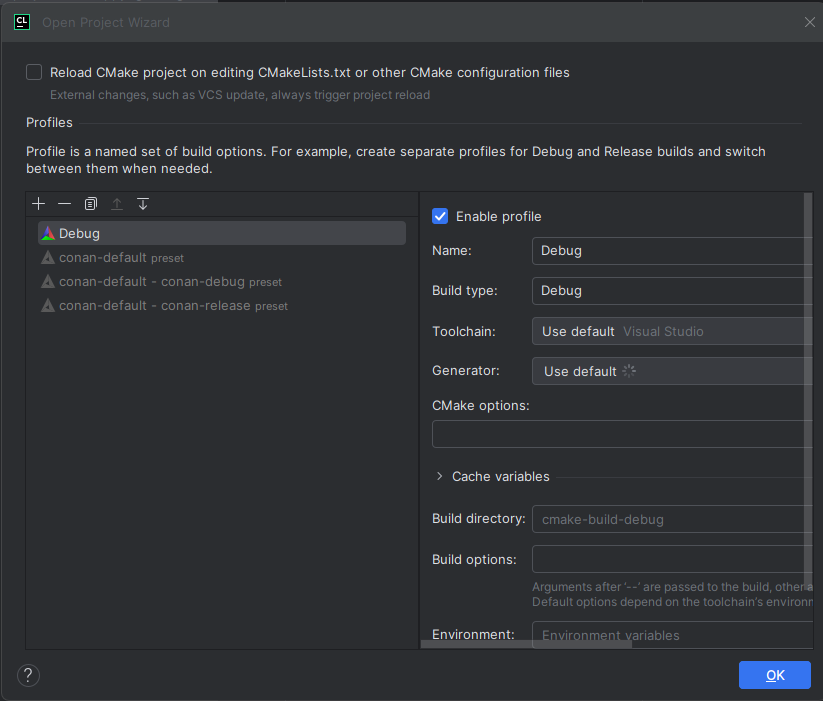
We need to remove the Debug using the - icon and enable
conan-default - conan release by selecting the profile and clicking on
the Enable profile checkbox
CLion will take a moment to load the project. When the project is fully loaded it's possible to build and run the application throw the buttons on the top-right side of the window.

Summary
You have achieved a lot! Setting the C++ environment in a cross-platform manner is very challenging. Also experienced developers will require hours just to build a similar project! What we've achieved is simply amazing!
I need your help!
Did you notice? This website is free from all the bloated advertising and annoying alert messages popping up all the time! I want this to be a pleasant experience everybody can enjoy without distractions.
This requires a lot of energy and efforts from my free time, if you like the content of this website, and you want to support me buy me a coffee! Your supports help to keep this homepage updated with new content.
